Robotlegs v1.5.2 Basic Setup For AS3.0 Application
Introduction
Robotlegs is a framework for ActionScript 3.0 . Its a MVC+Service framework , you can google all the information about it and its comparison with other frameworks for AS3.0 ( Mate , PureMVC , Gaia etc ).This post focuses on the implementation of RL ( Robotlegs ) in pure AS3.0 . Because the examples available for RL are mostly in Flex.
In this Post only single or pure Robotlegs application is set up .I will be posting about Modular Robotlegs in detail, soon. Before getting started here are the links for Robotlegs:
RobotoLegs Website - Download SWC
If you are new to Robotlegs then you should read the help and examples on Robotlegs.org ,
Or If you are a genie ,you can just follow the steps or example given below to get started you app up and running
I am using FlashDevelop and Flex SDK 4.6 . You can use Flash IDE or FDT or whatever you like . The project will have five classes. And of course
 Robotlegs framework .
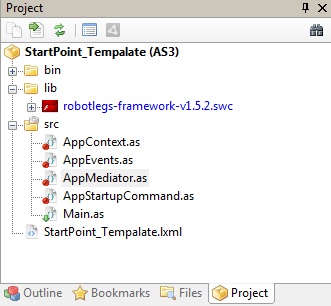
Setting Up Project
Little Knowledge
The MVC pattern separates Model(Data) , View (Presentation layer) and Controller (actions,triggers or Buiseness logic :P ).
The View
Our Main class is main View of our app which extends Sprite class.This will be our main application view and document class.
Main.as
package
{
 import flash.display.Sprite;
 import flash.events.Event;

 /**
  * ...
  * @author theXaib.com
  */
 public class Main extends Sprite
 {
  public var context:AppContext;
  public function Main():void
  {
   if (stage) onAddedToStage();
   else addEventListener(Event.ADDED_TO_STAGE, onAddedToStage);
  }


  private function onAddedToStage(e:Event = null):void
  {
   removeEventListener(Event.ADDED_TO_STAGE, onAddedToStage);
   // entry point
   context = new AppContext(this);
  }
  public function init():void
  {
   // adding other app views

  }


 }

}
Nothing special here, Now Robotlegs requires a context , It lives in its context, so we will be declaring a context in the Main.as .
public var context:AppContext; The Context
AppContext.as extends Context of RL. When Main.as is ready , context is instantiated . We are passing our Main.as view as the parent of the context .The AppContext.as is following:AppContext.as
package
{
import flash.display.DisplayObjectContainer;
import org.robotlegs.mvcs.Context;
/**
* ...
* @author theXaib.com
*/
public class AppContext extends Context
{
public function AppContext(contextView:DisplayObjectContainer)
{
super(contextView);
}
override public function startup():void
{
commandMap.mapEvent(AppEvents.STARTUP, AppStartupCommand, AppEvents, true);
// Mapping All Mediators other than Main View
dispatchEvent(new AppEvents(AppEvents.STARTUP));
}
}
}
The AppContext starts the RL framework , we override its startup method. Here the AppStartupCommand is registered with AppEvent.STARTUP event. Then we will be adding all the other views ( MovieClip,Sprite ,Image etc), i will come to it later.
Now our command is registered with the Context , we need to launch it by dispatching the event.
Now our command is registered with the Context , we need to launch it by dispatching the event.
The Events
First we look at the AppEvents class which is simple and will be holding all the App event types.AppEvents.as
package
{
import flash.events.Event;
/**
* ...
* @author theXaib.com
*/
public class AppEvents extends Event
{
public var data:*;
static public const NAME:String = "AppEvents_";
static public const STARTUP:String = NAME+"startup";
public function AppEvents(type:String,data:*=null, bubbles:Boolean=false, cancelable:Boolean=false)
{
this.data = data;
super(type, bubbles, cancelable);
}
override public function clone():flash.events.Event
{
return new AppEvents(type, data, bubbles, cancelable);
}
}
}
The important thing in the AppEvents class is to override the clone method ( because RL documentation says so :P )
The Command
Now the AppStartupCommand.as :AppStartupCommand.as
package
{
import org.robotlegs.mvcs.Command;
/**
* ...
* @author theXaib.com
*/
public class AppStartupCommand extends Command
{
override public function execute():void
{
mediatorMap.mapView(Main, AppMediator);
}
}
}
AppStartupCommand extends RL's Command class.Its execute() method is called when this command is triggered , Here we are mapping the mediator with our View.
The Mediator
The Mediator mediates our View. i.e it separates the presentation layer from the backbone code. Every view class can be mediated .When that view is added to the context of the RL , the mapped mediator is automatically registered with the view. Lets see the AppMediator.asAppMediator.as
package
{
import org.robotlegs.mvcs.Mediator;
/**
* ...
* @author theXaib.com
*/
public class AppMediator extends Mediator
{
[Inject] public var view:Main;
override public function onRegister():void
{
view.init();
super.onRegister();
}
}
}
When someview is added to the main View( our Main.as holds the context),its mapped mediator is called and we override its onRegister() method so that all the back-end settings are done. Our Main.as (view) is already active and also we mapped AppMediator with it in AppStartupCommand, so AppMediator is executed.Mediator can access the its view by
[Inject] public var view:Main;The Robotlegs injects the mapped view to its mediator , (using SwiftSuspendersInjector). Now we can call init() method of the Main.as , where we can add more Views to the app.
Tada! the Robotlegs App is up and running.
The Source
You can download this basic setup project. Its a FlashDevelop AS3.0 project , you can use its src folder to start building your app.For demonstration of the communication between different views of the app , another project is also provided where two views ( TextView and ButtonView) communicate with each other.
Download Basic Setup Project
Download Basic Setup With Views

.png)
Comments
Post a Comment